Showing posts with label dinner. Show all posts

Sunday, December 15, 2013

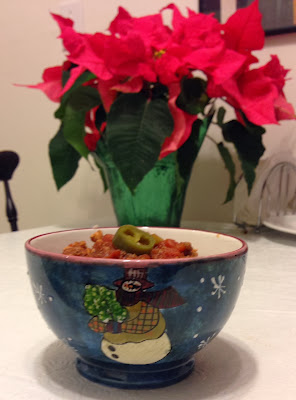
Chili!

I don't have too many photos this time, but I didn't really feel like standing on my feet in the kitchen today, so I made some chili in the slow cooker.

I had made some homemade pickled jalapeƱo peppers from the book Fermented by Jill Ciciarelli, so I added those in for some extra flavor. 


It took me about 30 minutes to prep, I browned the meat while cutting the vegetables. Then I let it cook on low for about 3 hours before I turned it down to "keep warm."


Here's what I used:
1 lb. grass fed ground beef, browned 
1 lb. ground turkey, browned 
1 large can organic diced tomatoes
2 cans organic tomato sauce
1 can organic red kidney beans, rinsed (optional-- I don't eat them, but the hubs does)
1 green bell pepper, diced
1/2 sweet onion, diced
5 small garlic cloves (2 larger ones)
4 (or more) slices cooked bacon, crumbled
1-2 tbsp. raw, local honey
For the Chili Seasoning (sometimes store bought chili seasoning packets have flour and sugar added. When you make your own, you can control the amount of salt if you are watching your sodium intake.)
2 tbsp. chili powder
1 tbsp. cumin
2 tsp. oregano
1 tbsp. seasoning salt
1 tsp. cayenne pepper

Here's what to do:
Throw it all in the slow cooker, stir it up, turn it to low and let all the flavors mix together for a few hours, until you are ready to eat.

Tip: If you like your chili more chunky, take the lid off for 20 minutes, or put it on sideways for an hour and some of the water will evaporate 

Serve it up in your favorite bowl!

Sunday, July 28, 2013

EZ Roast Chicken

I bought an organic, free-range chicken the other day.  When I got home from the store, I rinsed it off, took the packet out of the cavity and stuffed some lemons in there.  I sprinkled it with salt and pepper.. you could add more spices though.  I put it in a bowl and left it out to dry off a little bit.  Then, I put it in the fridge for 2 days.


When I was ready to start cooking, I slid it into a glass baking dish and put it in the oven at 425 degrees.  

After an hour, I checked it and it was getting brown on the outside, but it was not fully cooked.  I turned the oven down to 400 so that it didn't get too brown on the outside.  I put it back in for about 30 more minutes and it was done!


I had my hubby cut it up and I served it with broccoli and steamed cabbage!

Wednesday, July 24, 2013

ZOODLES!

My turning slicer, as discussed in the last post.


We made Zoodles (zucchini noodles!!)


We placed them in the cast iron skillet with a little bit of oil, some onions, and seasoned salt.  We fried them up to al dente texture (about 8 minutes).


Then, we at them for breakfast with bacon, eggs, and gluten-free banana pancakes!


Noodle slicer!

So I was pleasanlty surprised one day to come home to a package.  Turns out it was this little gem from my brother-- a housewarming gift!!


It's a slicer that also makes food into noodles.  He came to visit me for the week, so we tried it out and liked it.  We tried to make everything into noodles!! We had curly sweet potato fries this night.  After he sliced the sweet potatoes (it only takes about 2 sweet potatoes to feed 4 people), we placed them in a bowl and drizzled oil on top.  


We shook it up to coat the potatoes with oil and then placed them on the pan.  We tried to make sure to spread them out evenly.


We placed them in the COLD OVEN... yes, we did NOT preheat it!  Then turned the oven on to 425 degrees and baked them for about 12-15 minutes.  When you let sweet potatoes warm up slowly, the natural sugars come out so there is no need for sugar and butter!

We served them up with some grilled veggies and steak cooked on the grill.  Perfect summertime meal!

Wednesday, June 26, 2013

Breaded tilapia

I LOVE breaded fish, but I am trying to stay away from gluten. BUT.... Look what I found!!!
It's made with rice flour and Italian seasonings! 

I am also trying to avoid eggs, but I needed something to hold the bread crumbs!


I had my cast iron frying pan nearby with a little bit of oil in the bottoms to fry those puppies!! 

I fried them until they were a bit flaky and served em up with some roasted broccoli and roasted chickpeas!

Yum!


Tuesday, June 11, 2013

Apple sausage pasta

This was such an easy dinner and not too many dishes to wash either!! 

First I sliced the chicken sausage into small diagonal chunks and cooked it in my cast iron frying pan in a teeny bit of oil... palm fruit or coconut is best.  Al Fresco makes other chicken sausage flavors too.  This one has maple syrup in it, so it's not the best, but hey, it was yummy!


While it was cooking, I cut up my veggies.  This is just what I had on hand-- petty pan squash, yellow squash, onions, and some frozen peas. You could add any other veggies that you want.


When the sausage was done cooking, I took it out and put it in a glass dish with a lid to keep it warm.  I used the same pan to fry the vegetables.  I put a lid on the pan so they steamed a bit.  While the veggies were cooking, I put the water on for the noodles.

This is organic brown rice pasta.  It tastes JUST like regular pasta. 


When it was all done cooking, I splashed a tiny bit of oil onto the pasta, some seasoning salt, and some garlic powder on.  I put it in the dishes above to keep warm since the hubs was not home yet... his is the one with more pasta.. lucky!!  

Sunday, June 2, 2013

Meatballs

We LOVE pasta in this house!  Lately we have been making our own sauce so that we know EVERY ingredient that goes into it. We eat brown rice pasta and we cannot even tell the difference! Brown rice pasta is made from rice, which is a grain, so it does not have gluten or flour in it.  Your body process grains slower than gluten or flour and it is low on the glycemic index. 

I made these lean meatballs to go with our sauce and our brown rice pasta.  First, gather all the ingredients.  I like to sneak in extra vegetables for flavor and fiber, so get a big mixing bowl and add in your ingredients. 
Disclaimer: I NEVER measure things!  I will give you an estimate of the measurements, but add as much or as little as you desire.   :)

 1 egg
1/4 c. chopped onions
1/4 c. chopped green peppers
2 tbsp. tomato sauce (homemade)
1/2 c. almond meal (added for extra protein)
and of course, your lean meat-- I used 97% lean ground beef, 
but ground pork, ground chicken, or ground turkey would work as well


Stir it up and form it (even though I hate touching raw meat, I had to use my hands)


I used my cast iron skillet and added some sauce and some oil 
(palm fruit or coconut oil are best, but I only had olive oil, so I used that)

Cover the pan, set it on medium heat and wait until they are AT LEAST half cooked


When they are about half browned, you can turn them over.  Some of mine broke, so be VERY careful! They are done cooking when they are all the way brown and the internal temperature is about 160-165 degrees. 


Serve them with brown rice pasta and LOTS of sauce.. ok, you don't have to have a lot of sauce, but that's what we like!

Full Recipe makes about 6 servings

Ingredients:
1 egg
1/4 c. chopped onions
1/4 c. chopped green peppers
1/4 c. tomato sauce 
1/2 c. almond meal (added for extra protein, but not necessary)
1 lb. lean, ground meat (beef, pork, chicken, turkey)
2 tbsp. oil (palm fruit, coconut are best)

1. In a mixing bowl, combine onions, peppers, egg, 2 tbsp. sauce, almond meal, and ground meat.
2. Mix it all up and form it into small balls of meat.
3. Add oil and desired amount of sauce to a frying pan and place the meatballs in the pan.
4. At medium heat, cook the meatballs until they are fully brown inside and out and the internal temperature is about 160-165 degrees.
5. Serve with brown rice pasta and tomato sauce and enjoy!